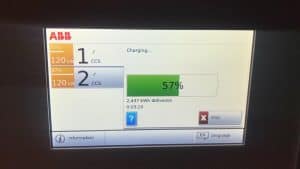
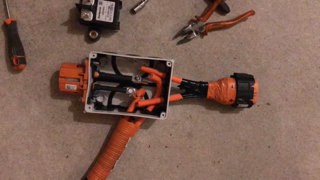
It has become apparent that CCS fast charging will be the dominating standard. So in the end the CHAdeMO infrastructure / coverage will not improve further and even shrink. This is bad news for all cars that have a CHAdeMO fast charge connection such as the Nissan Leaf. So with Nissan Leaf CCS fast charging the car will remain more usable.

Depending on where you live this is not an immediate issue since the CHAdeMO network at the moment is quite good. But the best news is, reftrofit solutions to convert CHAdeMO to CCS are emerging. Muxsan offers CCS as an upgrade option, but also DIY options emerge. I know Daniel (from Dala’s EV Repair in Finland) is working on an open source solution and I am supporting him where I can. Christoph from Sweden has CCS fast charging up and running on his Leaf and he agreed with sharing his DIY approach here.
DIY approach for a Leaf
For those who are interested in upgrading their Nissan Leaf or e-NV200 to CCS themselves there is an interesting option available. Damien Maguire reverse engineered the LIM (Lade-Interface-Modul) from the BMW i3 (and others).
With a LIM (make sure to get the correct version!), some additional hardware and a ‘process controller’ you can implement Nissan Leaf CCS fast charging. This post documents and shares the approach taken by EVcreate customer Christoph and more as soon as it becomes available. Thanks for creating and sharing!
Feel free to give it a go as well (at your own risk and no support via EVcreate or Christoph).
Leaf CCS system description
There are some key points to take into account when adding CCS DC fast charging to a Leaf (or another car that already has CHAdeMO).
- AC charging with the onboard charger also needs to keep working
- You need to integrate data from the BMS (eg max. allowed DC charge current, target voltage, errors, etcetera)
- When tapping into high voltage lines, the HV connector in the CHAdeMO socket must not be powered / energized during a CCS session and vice versa
Christoph’s Nissan Leaf CCS implementation
Let’s start with the proof and congratulate Christoph with this achievement and thank him for sharing all ins and outs!
What he basically does is make the Leaf think it is CHAdeMO charging and link all relevant parameters using his Raspberry Pi based process controller. He shared the following parts lis.
Shopping list
- Raspberry Pi (he used a Pi Zero W)
- Dual channel CAN bus HAT (he used the Waveshare 17912 2-CH CAN HAT)
- 8 relays which can be triggered by Raspberry Pi GPIO 3.3V
- BMW LIM from the junkyard
- CCS inlet with lock (1)
- A connector kit for the BMW LIM (he used the EVcreate LIM connector kit)
- Two contactors suitable for the LIM (he used contactors from EVcreate)
- Cable lugs matching the contactors (M5 to 35 mm2 lugs now also available from EVcreate, but consider using the busbar kit instead)
- High voltage cable between CCS inlet and a splice one has to create
between battery and motor (or in the CHAdeMO(2)) - To provide power to the Raspberry Pi he used a USB port which can be directly powered by 12V
- Various small bits and pieces
(1) The lock needs to provide 1k Ohm unlocked and 11 kOhm locked. The original i3 socket meets this requirement. I’m working on a “lock adapter” to also be able to use a cheaper Duosida socket (will also be available soon).
(2) Wiring it in CHAdeMO gives an extra challenge to ensure the HV pins of the CHAdeMO connector are either inaccessible or unconnected during CCS charging. I’ve searched for 12V normally closed contactors (so by default CHAdeMO works and you open them during CCS) but these are hard to source and very expensive.


Software
In terms of software you need Raspian, a recent Qt5 (just QtCore + QtSerialBus) and the ‘process controller’ software. Christoph shares that on Github:
Connections
The LIM is connected as described on the Openinverter Wiki: BMW i3 Fast Charging LIM Module.
Four relays are controlled by GPIO 15 (he soldered the pins of a four relay board together so just one wire). They are switching the following wires between the onboard charger and the LIM(3):
- Control Pilot (CP)
- Proximity (PP)
- Charge lock actuator driver wire 1
- Charge lock actuator driver wire 2
(3) Initially these wires need to be connected to the LIM. In particular the PP is needed for wakeup and the CP is needed for the LIM to determine if it is going to be a DC or AC charge session. In case of an AC session, the CP and PP and charge lock actuator wires need to be made available to the OBC. This allows the OBC to continue it’s normal operation as if no LIM was implemented.
One relay controlled by GPIO 2 simulates the charging flap (LIM 4B-12 and GND).
The three remaining relays (controlled by GPIO 4, 3 and 14 (in this order)) connect to the CHAdeMO port pins. Pin 7 to GND. Pin 2 to 12V. Pin 10 to GND (4).
(4) By looking at the pinout of the B Connector of my CHAdeMO DC controller in the CHAdeMO fast charging in DIY blogpost it becomes apparent what these are. Pin 7 is the CHAdeMO Proximity pin. By grounding this pin, the car thinks a CHAdeMO socket is being plugged in. Powering Pin 2 with 12V emulates the “Charge start 1” signal normally from the CHAdeMO charger and after receiving a “Car in charge enable” grounding Pin 10 emulates “Charge start 2” from the CHAdeMO charger.
CAN BUS
One of the busses on the dual channel CAN BUS hat connects to Leaf’s EV CAN-BUS. Christoph connected it at the same place where the battery upgrade CAN bus bridge normally is installed. This video by Dala is helpful for understanding where this is.
The other bus on the dual channel CAN BUS hat connects to the LIM and the CHAdeMO port. For the software Christoph developed it doesn’t matter which of the busses is to connected to which of the two channels. The controller software is autodetecting the elements.
Bonus
It is even possible to add extra (TC) chargers to the LIM / CHAdeMO CAN. Of course the HV-splice then has to be between the battery and the motor. The software is prepared for it.
Remark
On purpose this is not a full “this is how you do it” blogpost. It gives you a lot of ingredients but will still require technical and software skills to get it all up and running. This blogpost and the insights shared by Christoph are “as is”. If you’re not sure how to proceed based in this info, please don’t. This is not intended as a plug and play and ready made solution. Instead it is shared for inspiration and a ‘it can be done’ example.
Dala’s Nissan Leaf CCS implementation
As mentioned, Daniel / Dala’s EV Repair is also working on a Leaf CCS solution. He is currently working on the coding. Having seen his work that he shared so far I expect it will be closer to “this is how to DIY” style.
I will update this blogpost as soon as his solution is available too. Until then, you can check out his kickoff video:
And if you want to support this development and be among the first to hear about progress, consider supporting him on Patreon: https://www.patreon.com/dala/
EVcreate’s Nissan Leaf CCS implementation
Myself I will probably not offer a dedicated solution for the Nissan Leaf (or other cars equipped with CHAdeMO). However, I am working on a CCS ‘process controller’ to work both with the LIM and another CCS fastcharge controller. It is intended to work together with aftermarket battery management systems such as Lithium Balance s-BMS and n-BMS, Orion 2 and Emus.
Further info and updates expected in Q1 2024. Sign up for my newsletter or follow me on Instagram @evcreate or Facebook /evcreate.
To be continued!
Blog series on DC fast charging
- DC fast charging, an introduction
- CHAdeMO fast charging in DIY
- CCS fast charging in DIY
- Nissan Leaf CCS fast charging
- EVcreate CCS fast charging solution including AC onboard charger control
- Performance = up to 500A peak (250A nominal)
- Standard = up to 125A max.
Feedback welcome
Any feedback, additions, suggestions for improvement is welcome. Please contact me by e-mail.
Share & link
Do you like this article? Please share and link (and not copy paste).
